· 5 min read
Getting Started with Teams Toolkit to leverage Azure Open AI with Teams AI Library
Exploring the Teams Toolkit to build Teams AI bots with Azure Open AI, opening the opportunty to add secure, enterprise grade AI to your Teams apps.

Introduction
Teams toolkit is a great way to get started with building apps in Microsoft Teams but combine this with Teams AI Library announced at Build 2023 wih Azure Open AI for a powerful combination to add intelligence to your Teams apps. I wanted to explore the new extension updates and found a couple of stumbling blocks for me to get started with this, so I thought I would share my experience and how to get started with this new capability.
What is the Teams Toolkit?
The Microsoft Teams Toolkit is an extension for Visual Studio Code and Visual Studio 2022 that helps developers build and deliver apps faster for Microsoft Teams. The toolkit provides many new features and capabilities that make it faster and easier for any developer to build apps for Teams.
I won’t be going into too much around the capabilities of Teams Toolkit in this post, but I will be focusing on the new Teams AI Library and how to get started with it.
The latest preview version of Teams Toolkit introduces a new template for a bot with Teams AI Library support.
What is Teams AI Library?
At Microsoft Build, the Teams AI library was announced in public preview providing a a set of AI capabilities to enhance applicationns with the use of Open AI or Azure Open AI services.
This is currently in preview and is likely to change, but the current capabilities are as follows:
- Interaction with the Open AI or Azure Open AI service
- Mapping of intents to actions
- Prompt engineering
- Conversational history
- Support for Adaptive cards
I haved used the library for a while now and found it to be a great way to integrate AI features into your applications.
Pre-requisites
Before we get started, you will need to have the Teams Toolkit installed, you can find the latest version here: https://aka.ms/teams-toolkit-preview, for me, I switched to the pre-release version to see the new AI Bot template.
Next, you will need an Azure Subscription with Azure Open AI enabled, you can find out more about Azure Open AI here: https://azure.microsoft.com/en-us/services/openai/ but this is something you need to apply for, to get access to, there is a form to complete and response from Microsoft can take a few days, but in realty, I found this is much quicker than that.
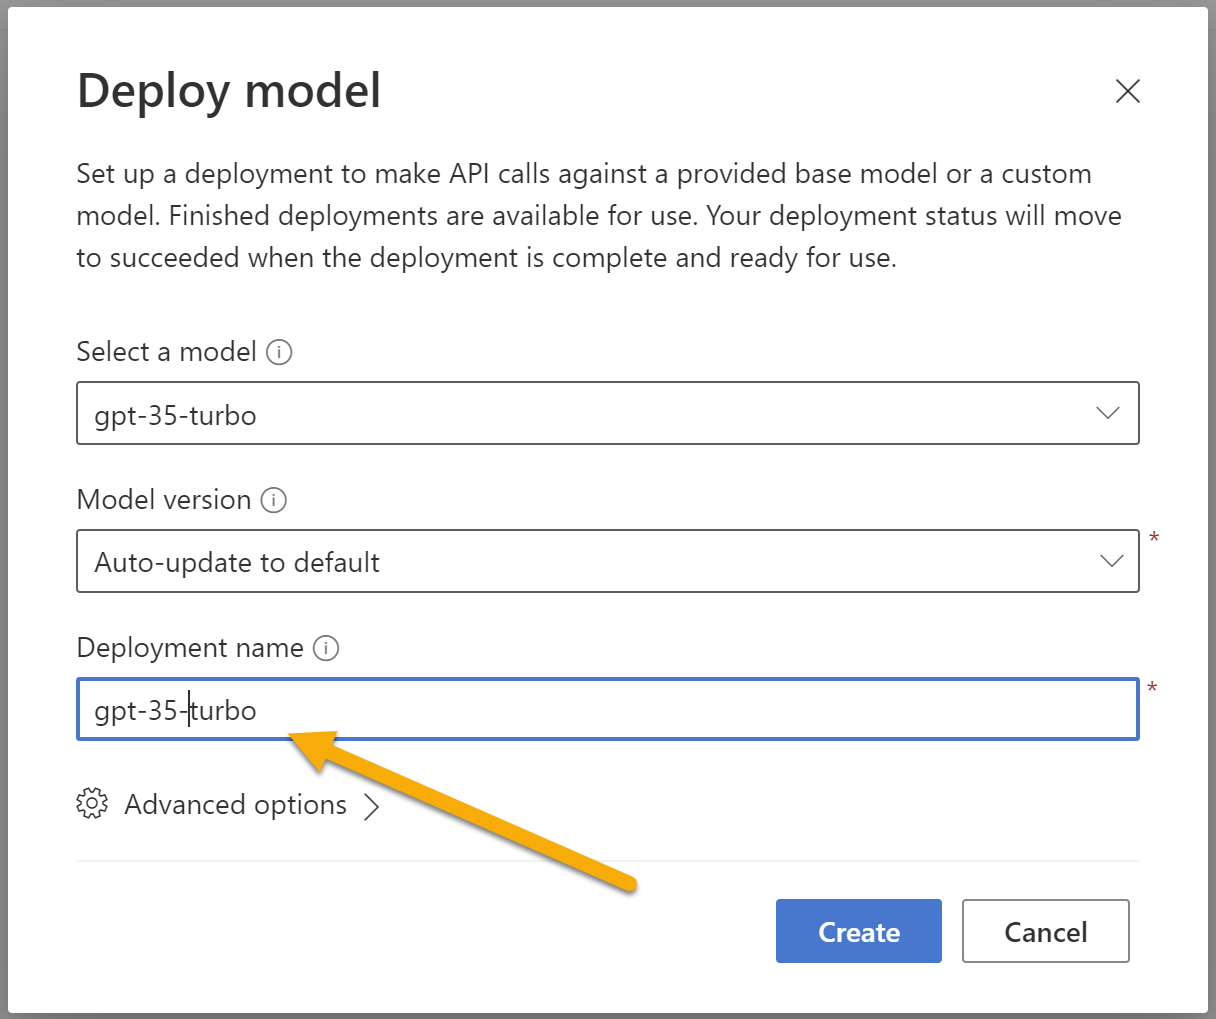
Ensure you deploy a model with a specific prefix
With the Teams AI Library, it is important to get the deployment name with a specific prefix of “gpt-” + model name e.g. gpt-35-turbo. The Teams AI Library does have references to this prefix for the chat completions feature.
Go to the AI Studio,
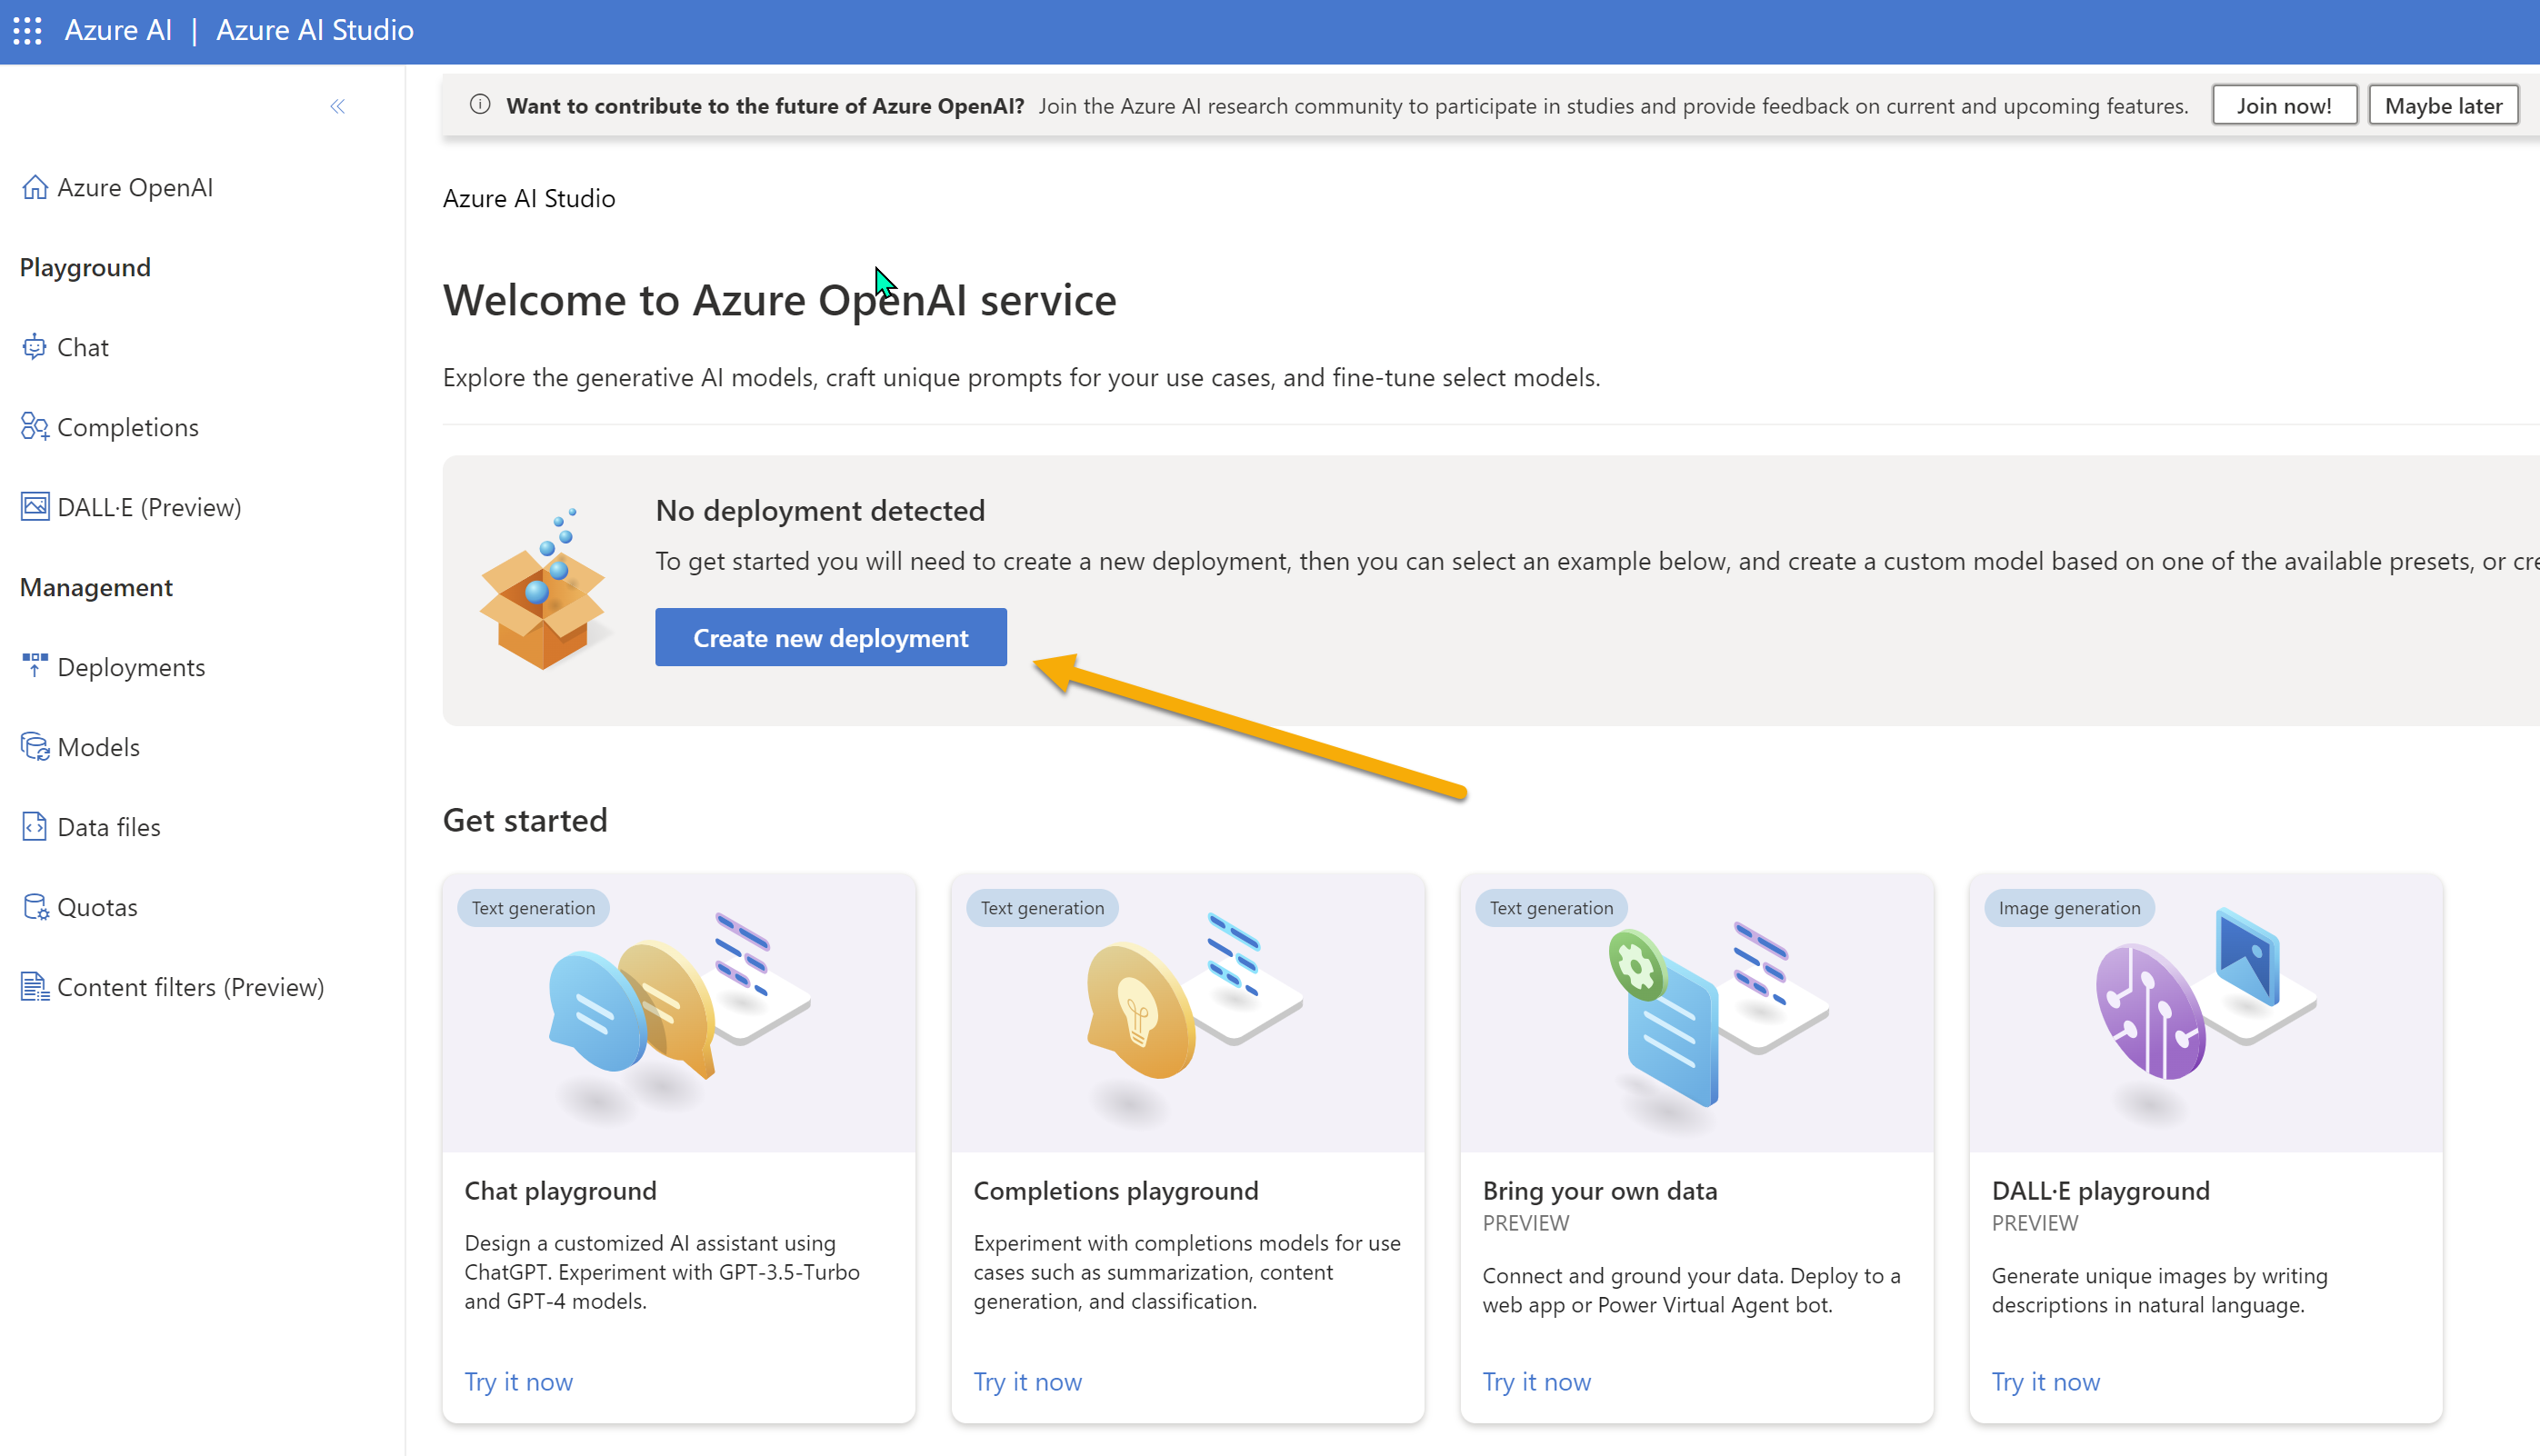
Note: Teams Toolkit uses the default model name of gpt-35-model for Azure Open AI.
If you are looking for Model GPT 4, you will need to further apply for this, but you can get started with GPT 3.5.
Setup of the project with the new AI Chat Bot template
So lets get started with creating a new Teams AI bot with Teams AI Library,
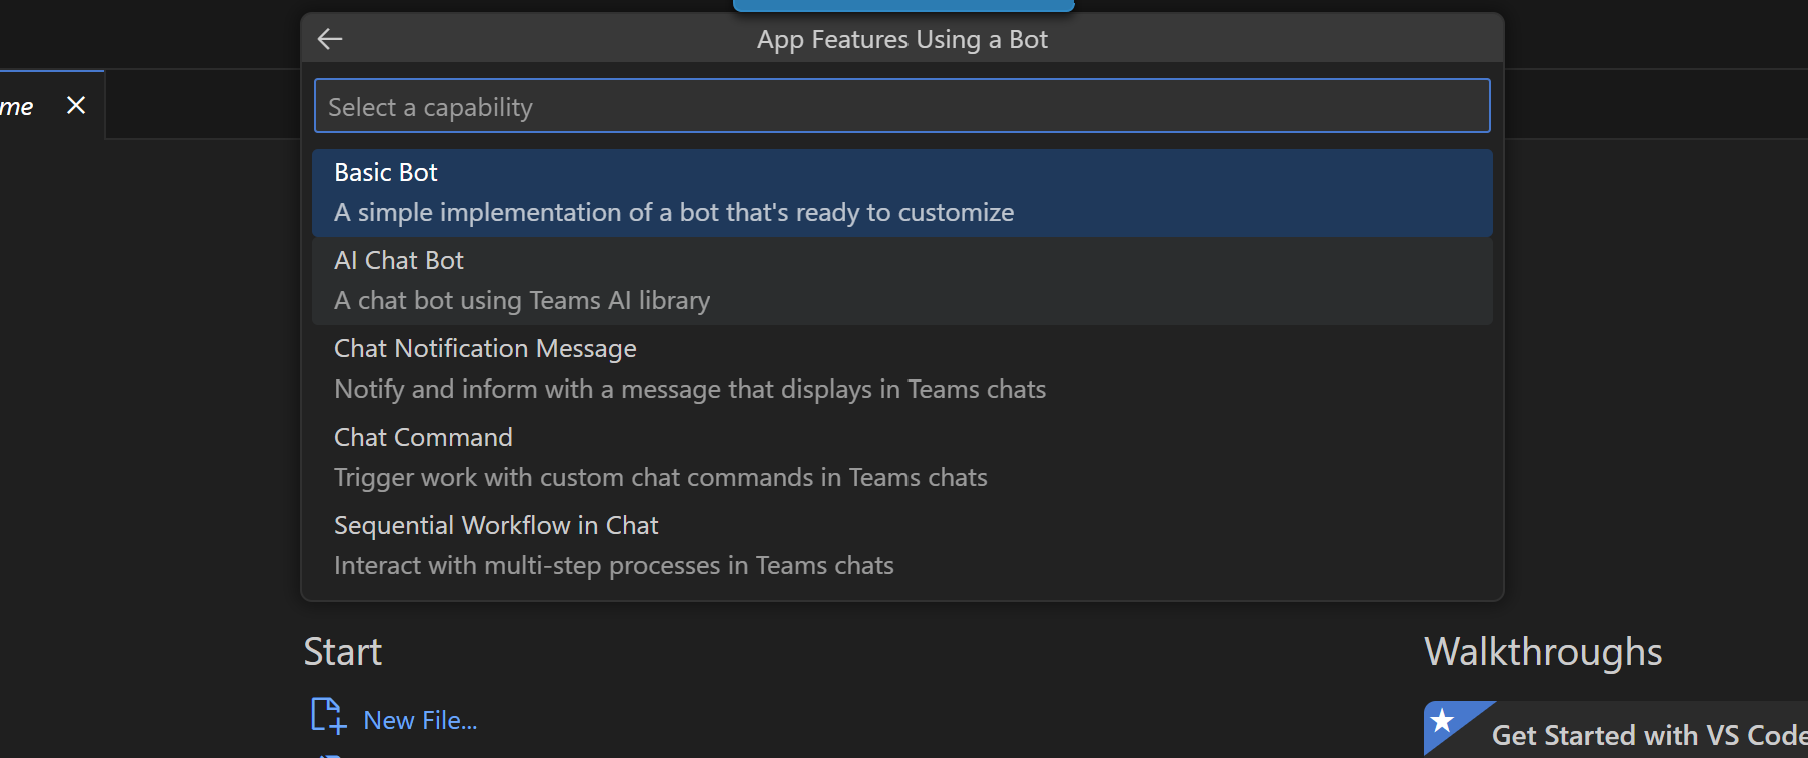
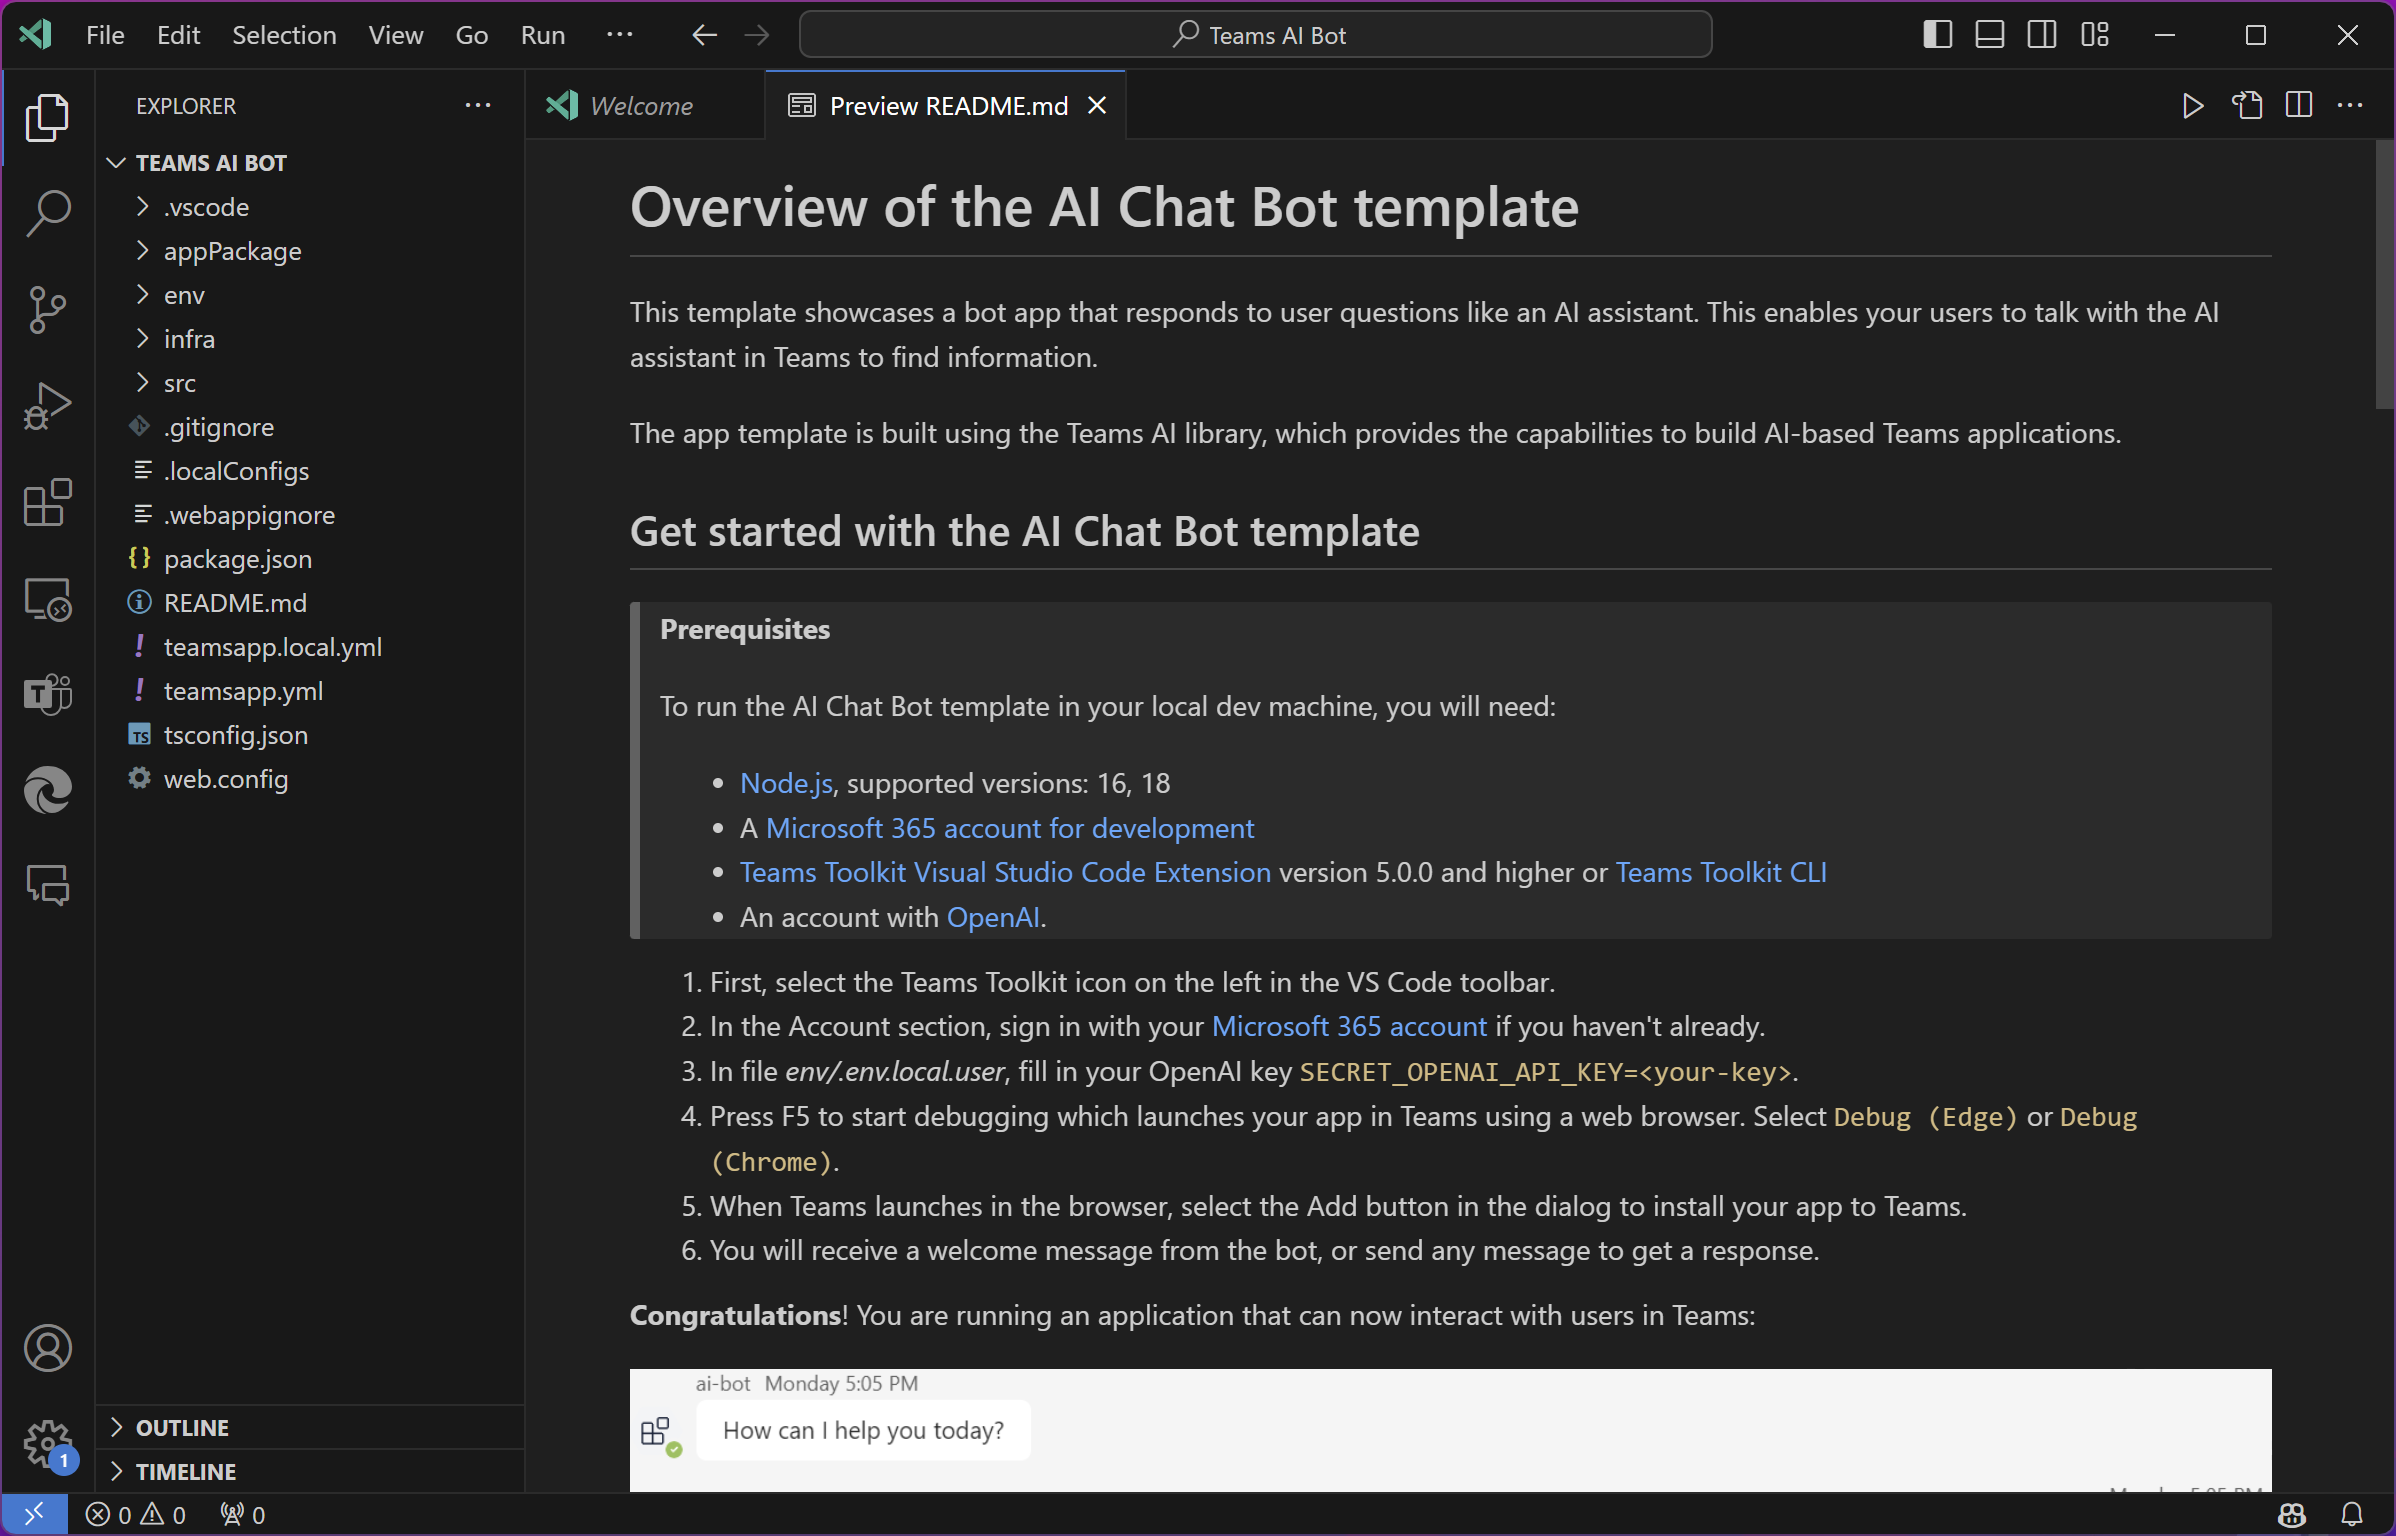
After you select, the AI Chat Bot, follow the prompts to create a new bot. Once this has completed you will be presented with a README file with instuctions on how to get started.
Switching the bot to use Azure Open AI
Lets begin to adjust the app to use the Azure Open AI Service within the newly created teams app.
Setting up the parameters for the Azure Open AI service
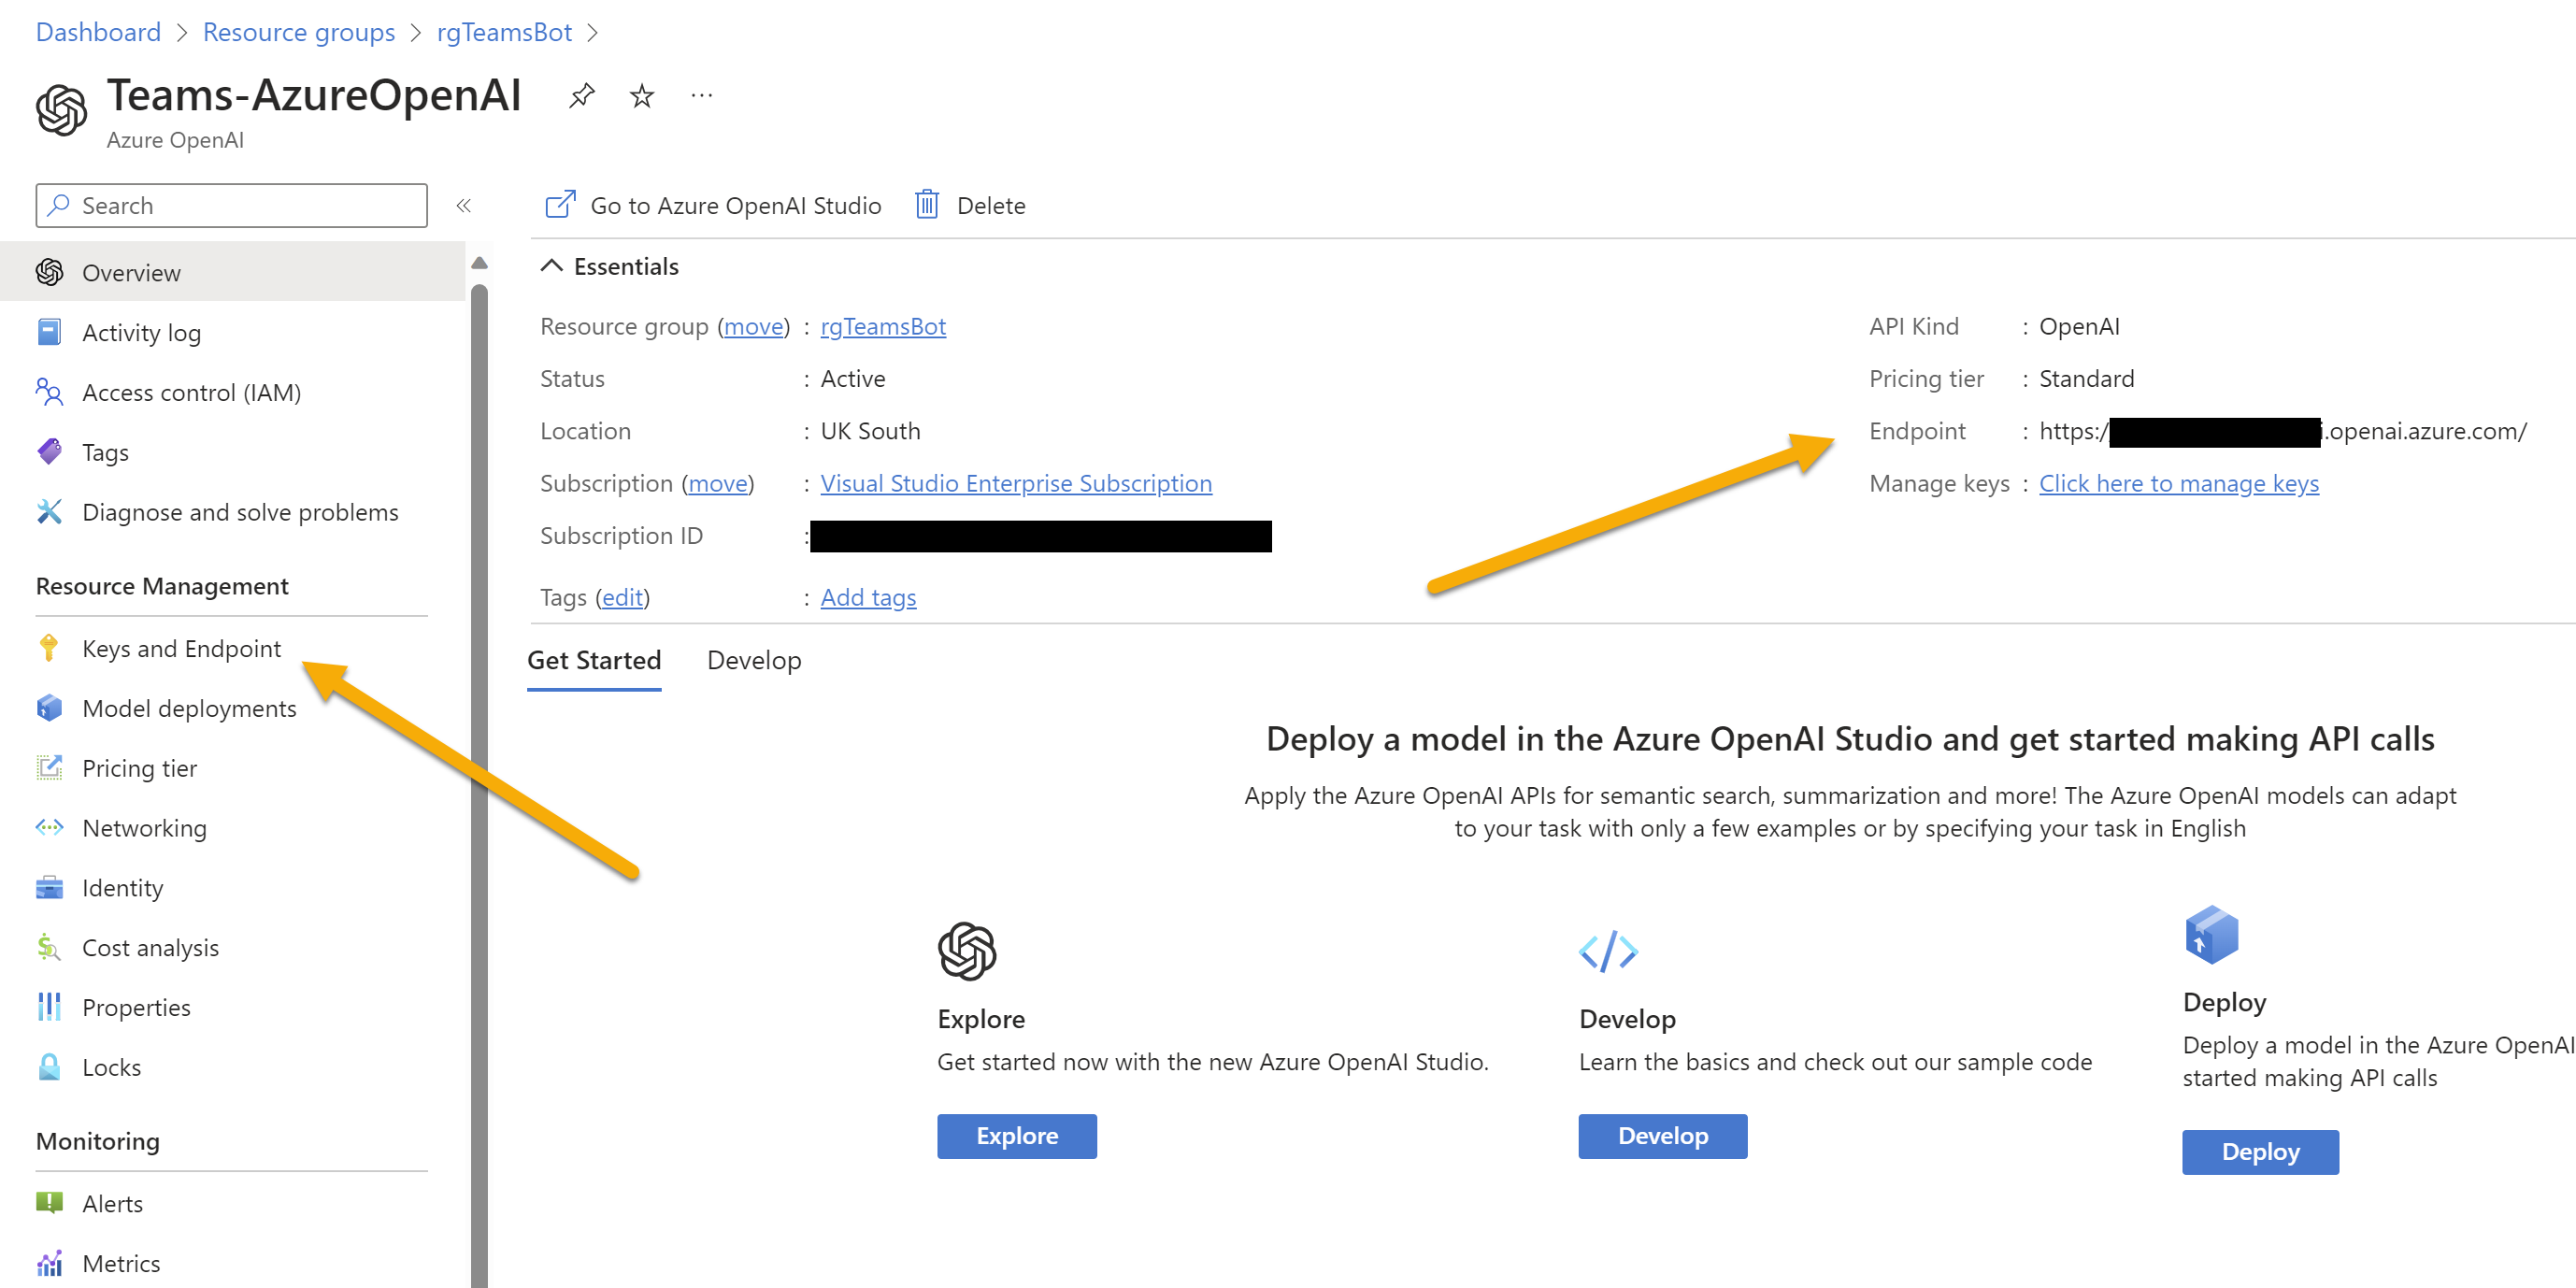
First lets grab the endpoint settings and keys from the Azure Open AI service. Lets go to the Azure Portal (not the AI Studio), we are looking for the Endpoint URL & Keys to the service.
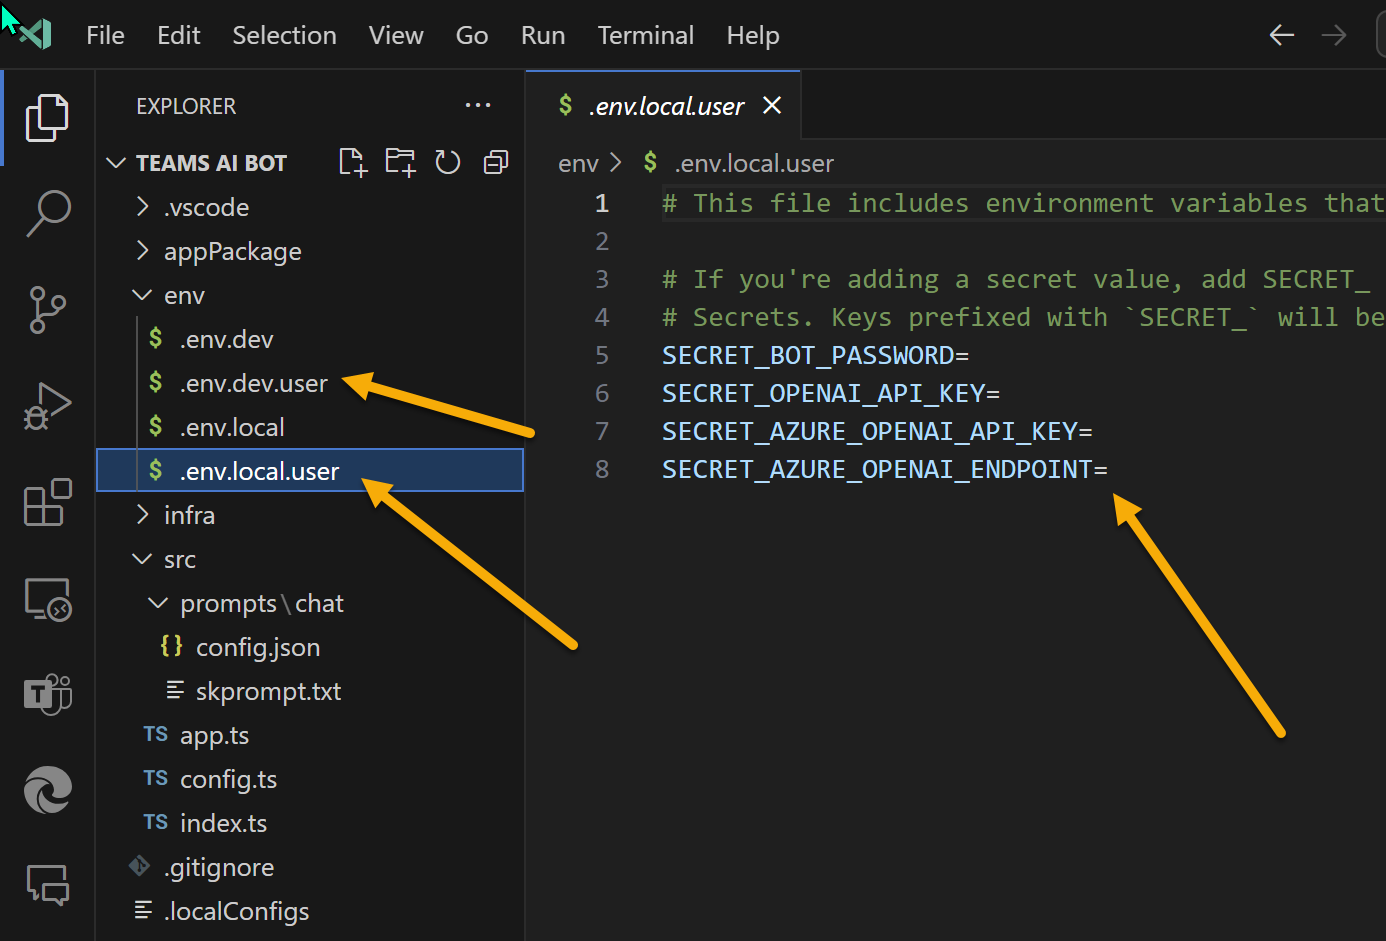
Find your environment variables in the project and update the values within the .env.local.user and .env.dev.user files where Teams Toolkit has already pre-populated with the parameters for you.
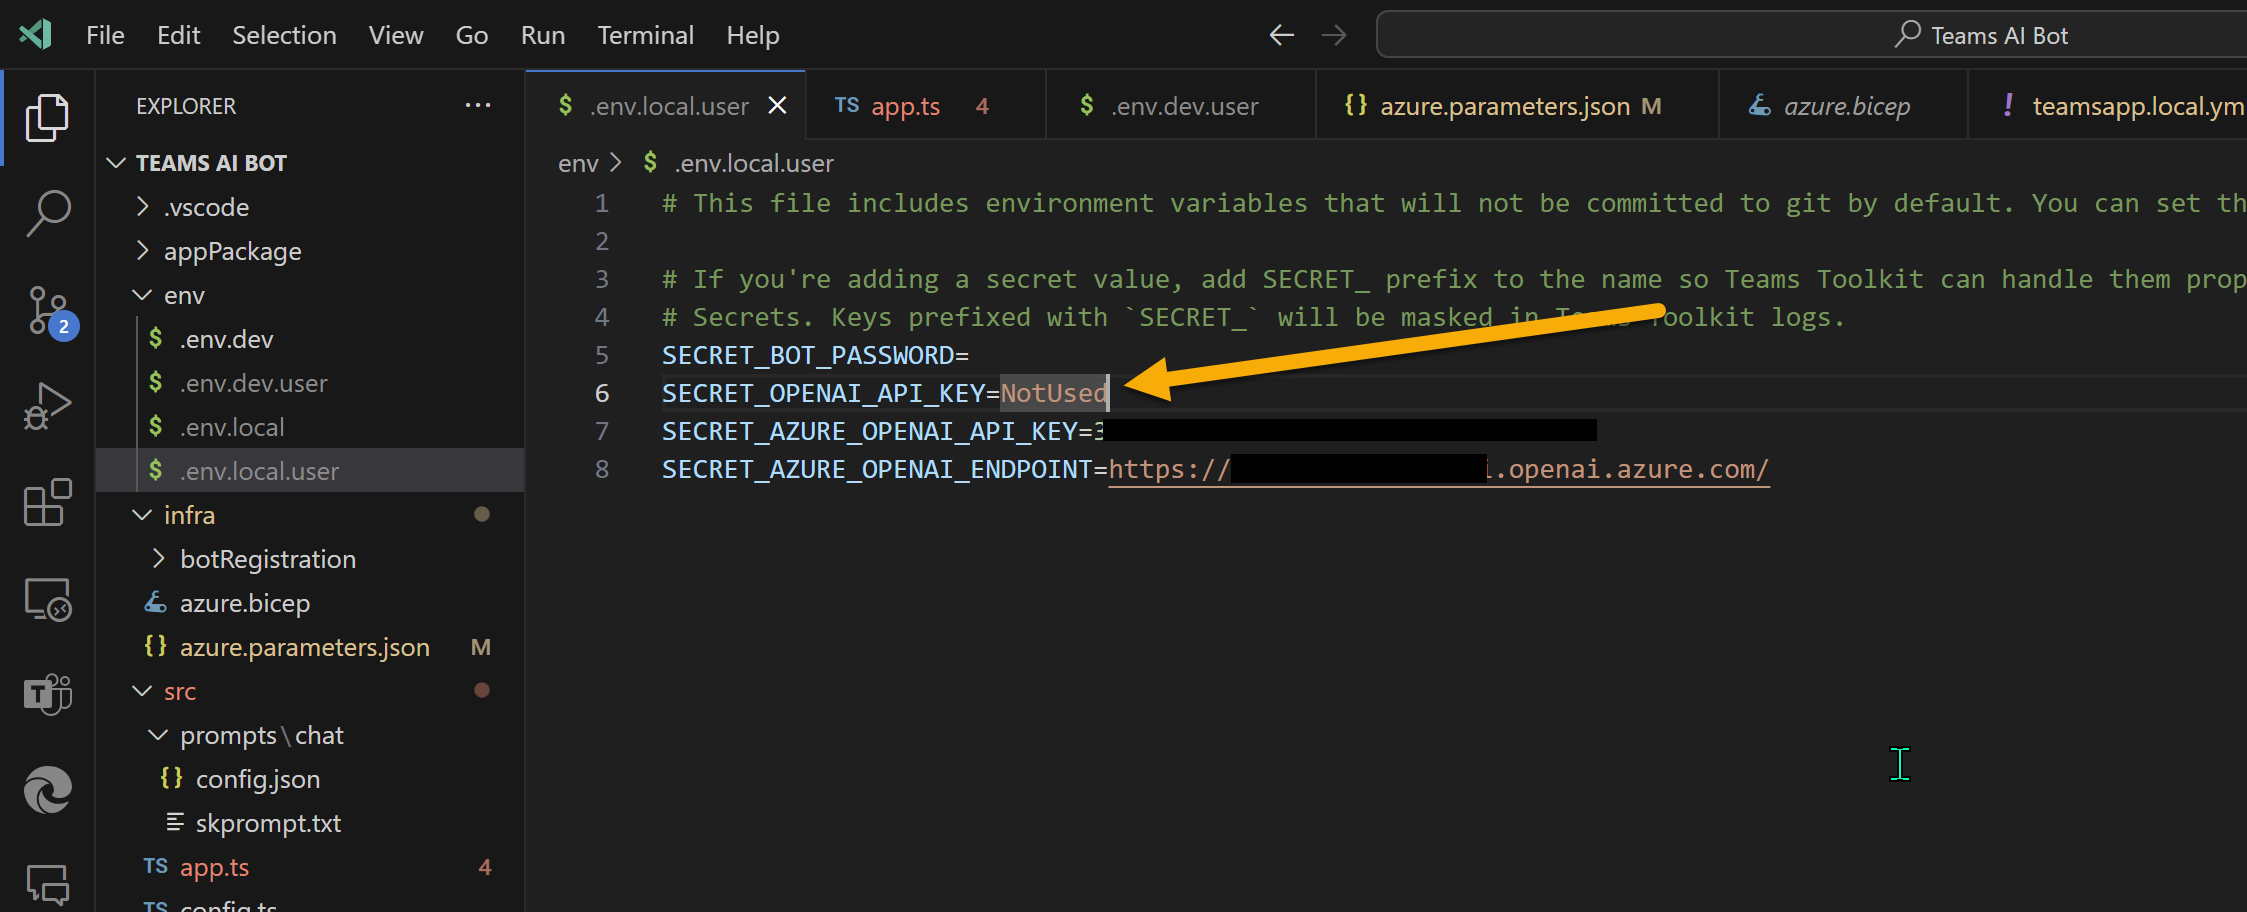
When testing the app (for this blog), I have found that the deployment fails if you do not specify a key for OpenAI enven though we are not going to use it.
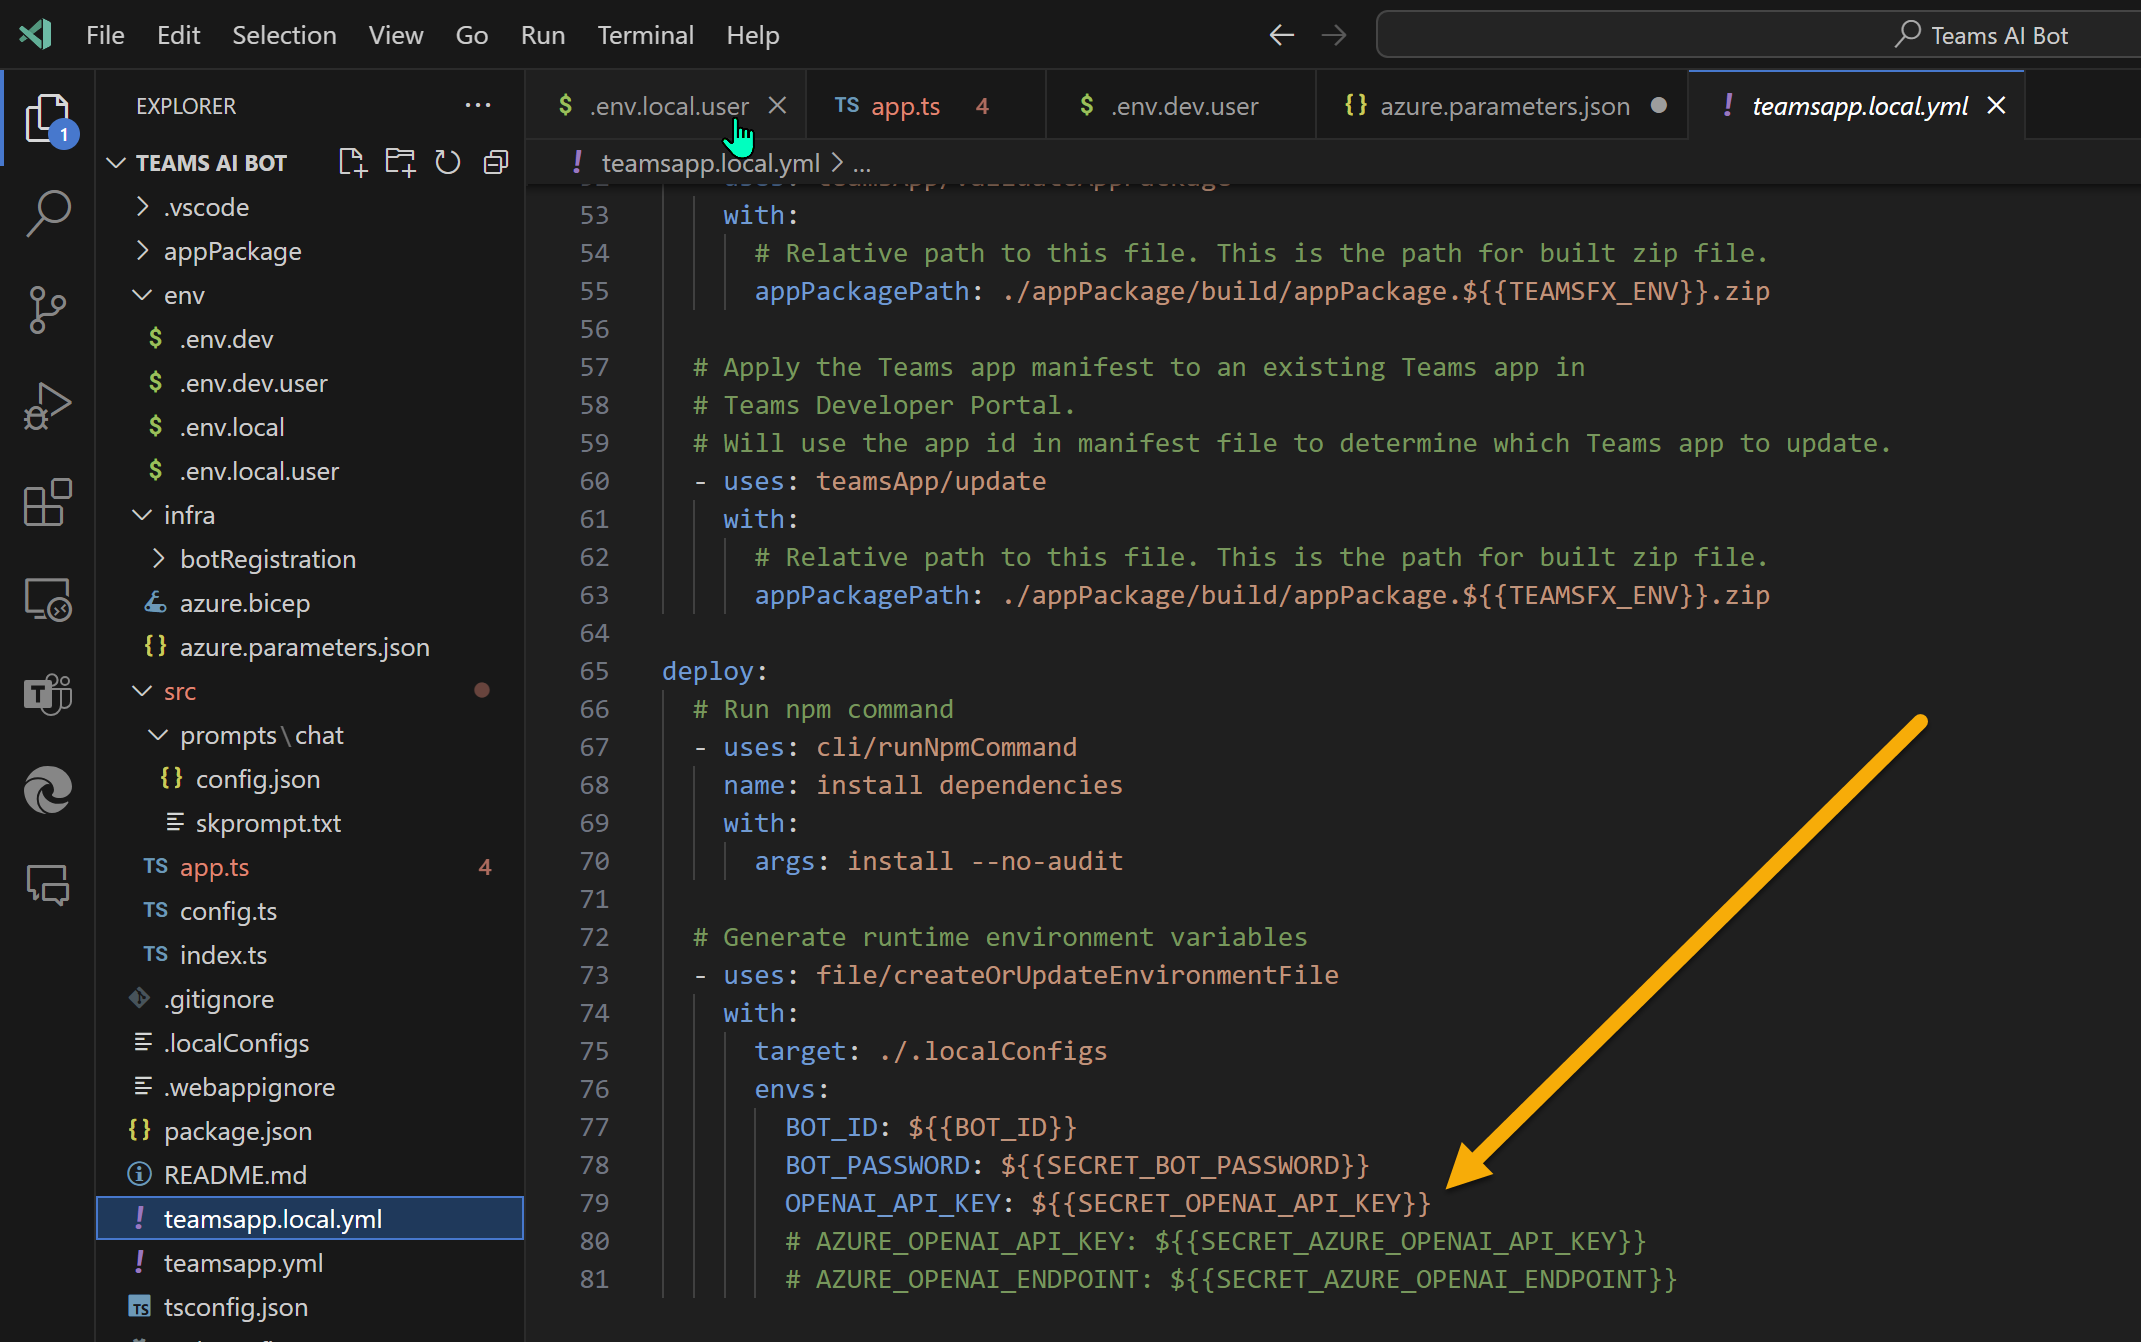
Lastly, we need to edit the teamsapp.local.yaml file, unommenting the parameters for Azure Open AI and commenting out the Open AI parameters.
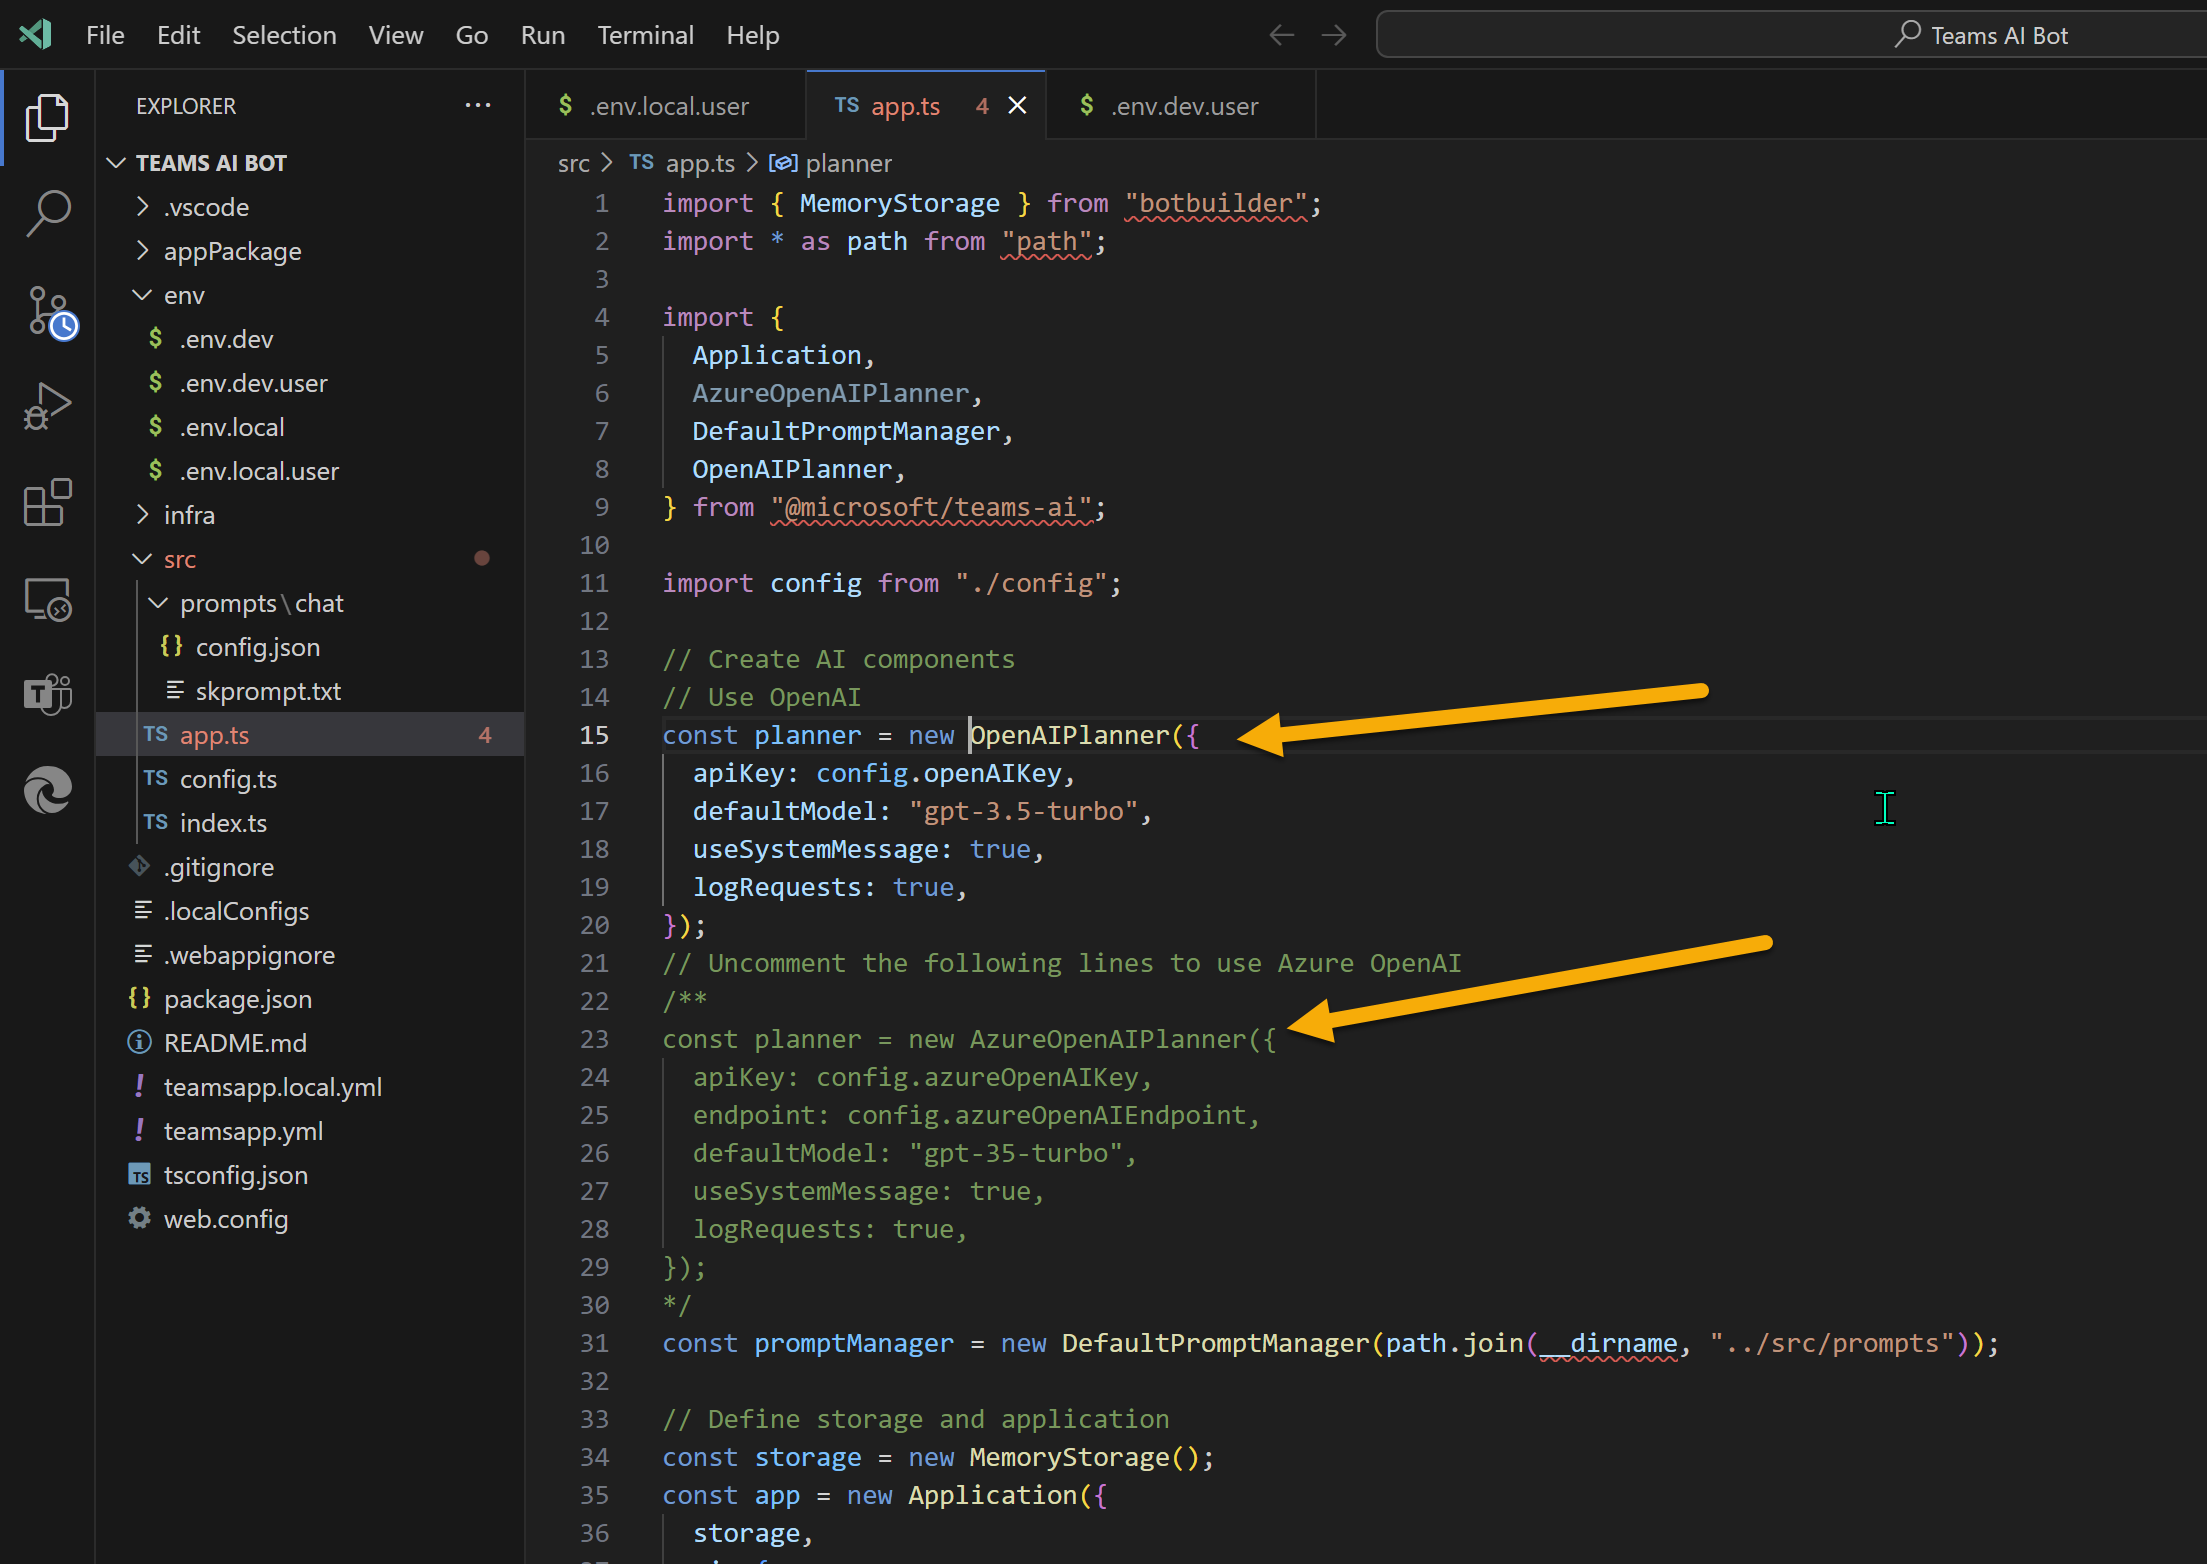
Next, lets navigate to app.ts (thank you for organising the code better for this app Microsoft, alot clearer) file, Teams Toolkit has included the code already in place to use Azure Open AI, but we need to uncomment the planner code to use it.
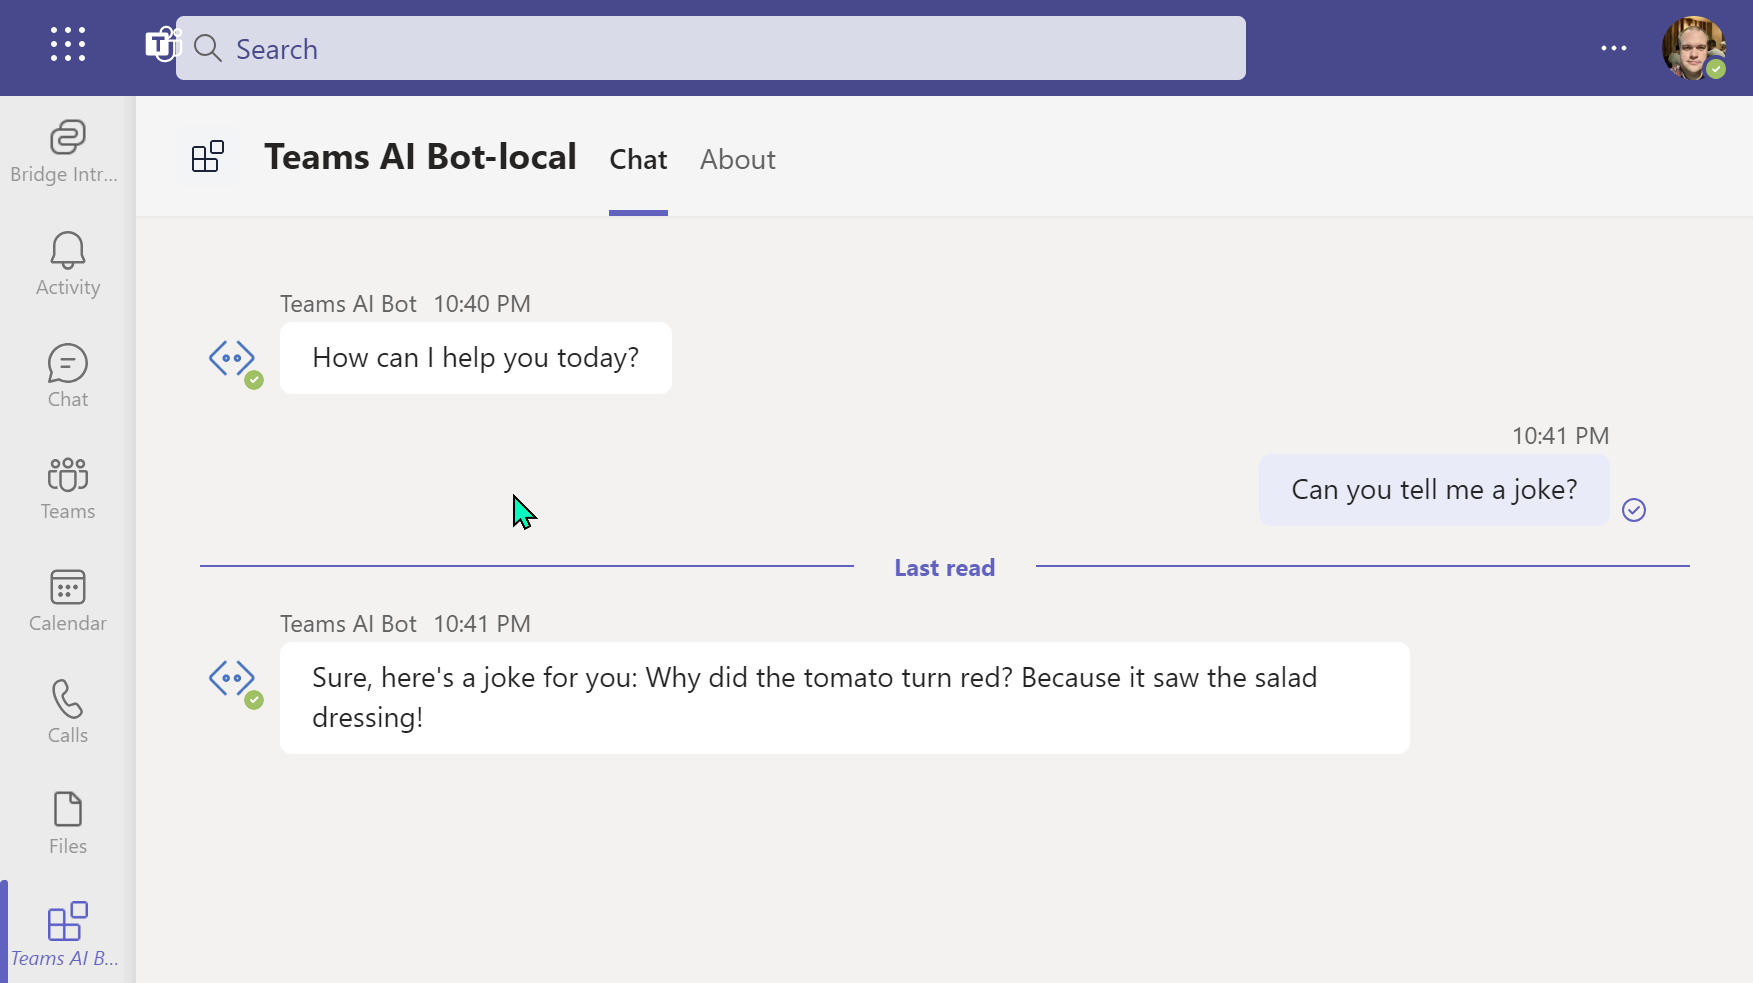
Once all these steps are completed, we are ready to run the app locally to test it out. For my validation, I typically ask for a joke from the bot, but you can ask anything you like, something that was not programmed into a response from the code within the bot.
Conclusion
We have ran through the steps to enable Teams AI library within you app, there is much more to learn about how to get the best responses from the AI service. Personally, to make it easier, I feel the extension needs another step to select the service you want to use and removing the redundant code for the other service.
Please note, this is preview and likely to change, I will endevour to keep this post up to date as things change.
Resources
Here are a few resources to help you learn further about these capabilities:
- Announcement from Microsoft | Microsoft Blogs
- Azure OpenAI Service Documentation | Microsoft Learn
- Teams Toolkit | Visual Studio Code Marketplace
- Teams AI Library | Microsoft Learn
Transparency Notice: Content within this post was assisted with AI to speed up the writing process and experimentation on my part, accuracy has been checked and adjusted where needed.
Enjoy!